Standard disclaimers apply.... if you would be worried
about killing your camera, don't read the following.
You will see how
to convert a FujiFilm RR-80 Remote Release into a simple IR Remote.
We add a $2 Radio Shack IR Phototransistor ( PN 276-0146 ) to allow the
RR-80 to be triggered by the IR burst from an IR intervalometer, like a
GentLEDS AUTO. The phototransistor also allows the remote
to be triggered by ambient light. For example, if you want
to set up a time lapse series to start when the sun comes up, you can
set the camera for continuous shooting and when light hits the sensor,
it will trigger the camera to shoot continuously.
Interrupting the light stops and starts the camera. Its that easy.
Its not a perfect solution in that when the phototransistor sees less
light it triggers the "half press" response. But the IR
also works in conjunction with the button... we merely use it to bridge
the full-press switch. Also when you DON'T want the
phototransistor to fire you need to cover or plug the hole we create in
the body of the RR-80. This is a small price to pay,
however, for the cool stuff you can do with the modified RR-80.
Parts needed:
- FujiFilm RR-80 ( you can build your own from parts, however )
- RadioShack 276-0146 NPN Silicon IR Phototransistor
- Salvaged connector from a PC speaker ( any type will do )
Time: 30 minutes
Difficulty: Easy if you know how to solder.
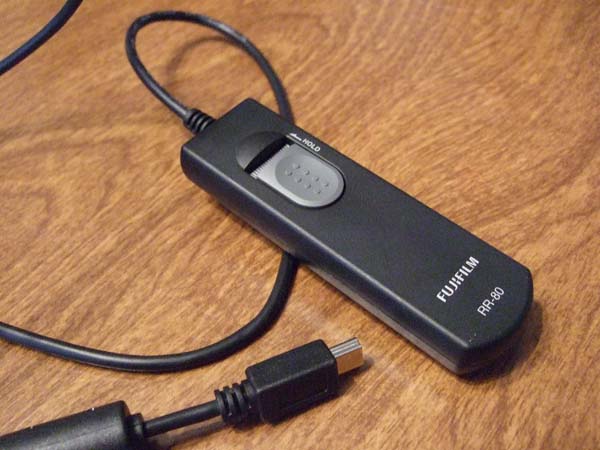
The RR-80 is a remote release cable for certain Fuji Cameras including
the S100fs. It connects to the cameras mini-USB
port. Mini-USB uses 5 pins, only 4 are used to carry
standard USB signals and power. Pin 4 is normally not used
or not connected. The RR-80 uses pin 4 to feed an analog
signal back to the camera. A simple network of resistors
and switches signal the camera to tell it that (A) the RR-80 is
connected; (B) the half-press button is depressed, and (C) the half
press and full press button are depressed. The camera just
detects the resistance between the USB GND ( Pin 5 ) and the normally
unused Pin 4. Its not sending a USB data stream.
Your mission, should you decide to accept it, is to pop your RR-80
apart and add a phototransistor across the switch that signals the
full-press position of the shutter.
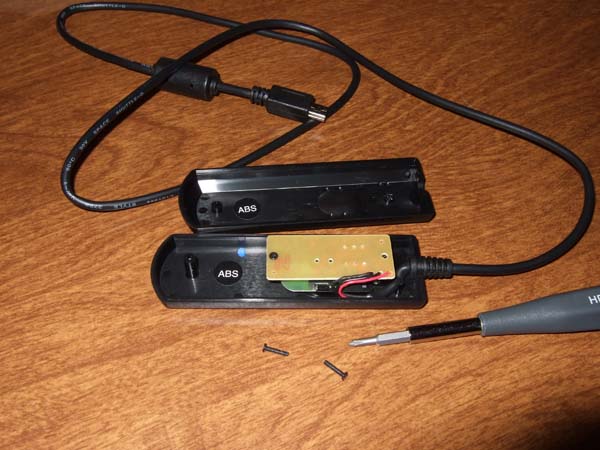
Removing the two long screws using a small phillips screw driver you
expose the greatest mystery of the 20th century.
After removing the single short screw holding the PCB and cable
assembly in place.
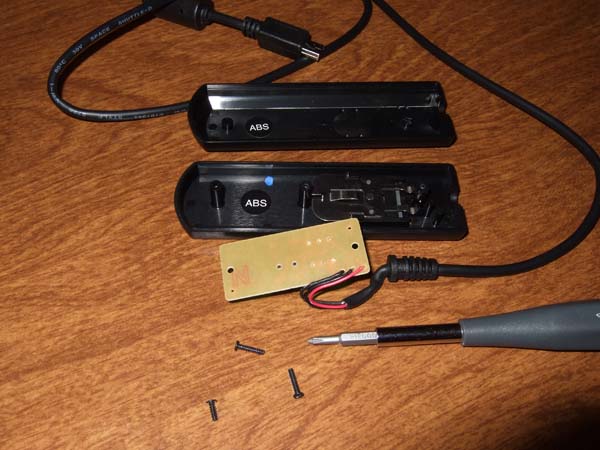
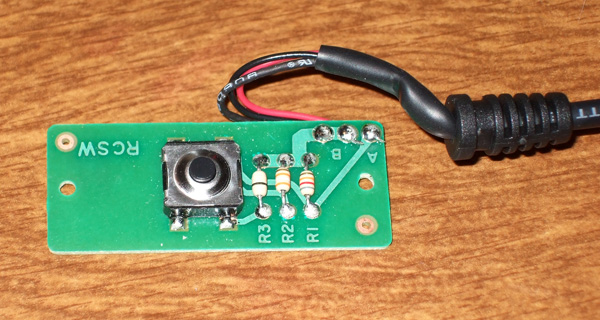
So here is whats
happening. The trace marked A is connected to the USB GND
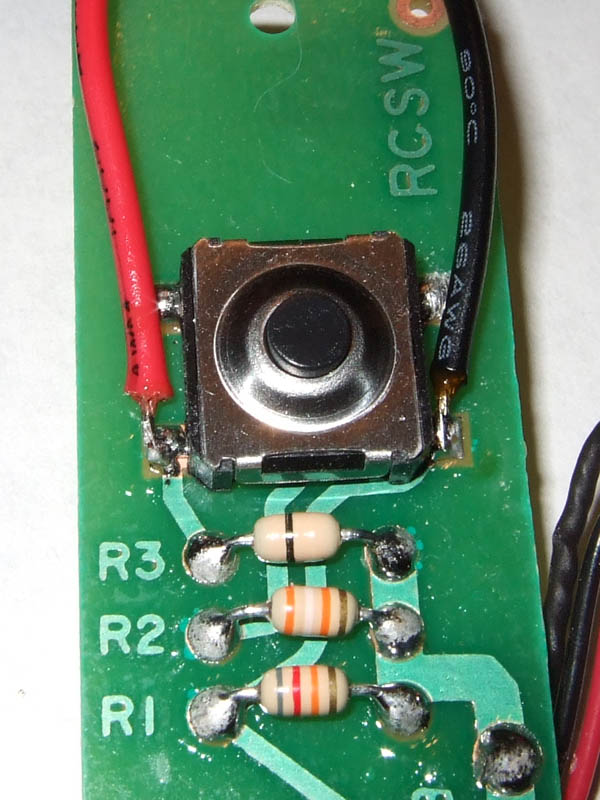
pin, and trace B is connected to PIN 4. R1 is connected
between the two, telling the camera something is connected to the USB
port. R2 is connected to the half press
switch. R3 is connected to the full press
switch. So for normal operation, there is an
82K resistance. Half press places a 39K in parallel with
the 82K, and full press places an additional 12K in parallel with
these.
So the big queston... can we simply use the full-press switch withouth
the half-press? If we have to transition between the
unpressed to half-pressed to full-press state, that complicates matters
tremendously. So orienting the RR-80 as shown below,
I shorted the pins on either side of the switch ( which I then attached
the red and black wires to ). On shorting these, the camera
focused and took a shot. Meaning that the half press is not
necessary and the exact resistance ( approximately 9K ) is not
necessary and the 12K provided by shorting across the full-press switch
is good enough. Very good news. But this was
tested with a S100fs, so testing would be necessary with another
camera. This is easy to do without destruction of your
RR-80.
So I wanted a way to attach the phototransistor across the
terminals. So I found a 2 pin connector in my junk
heap. You can buy something, or salvage one from a junk PC,
or just forget the connector an attach leads to the
phototransistor. I used the connector so I could
remove the phorotransistor and replace with a dry contact ( like a
relay or solid state relay ) if I wanted to or rework the remote
withouth further soldering. The switch is surface mounted,
so reworking it will eventually damage the PCB board. Uh,
and no, this is NOT my finest soldering job.
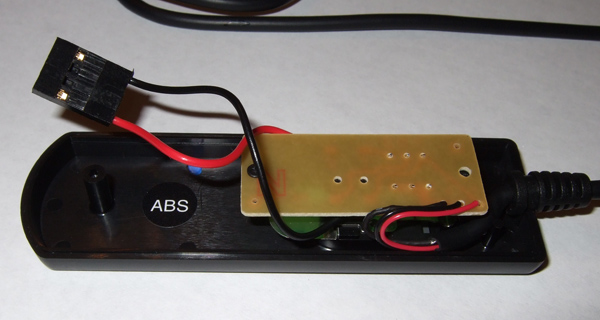
OK, so this looks a lot better all dressed up! Note the
capacious case of the RR-80 gives us plenty or room for this
modification. Now I'm a, well, to put it politely,
reubinesque guy... so I was getting sort of insulted by seeing the word
"abs" for 30 minutes. It did inspire me to to think about
that lapsed gym subscription. Note that the red vs black is
not arbitrary... Black is connected to the USB GND pin
via trace A on the PCB. So with an NPN
phototransistor its installed as shown.
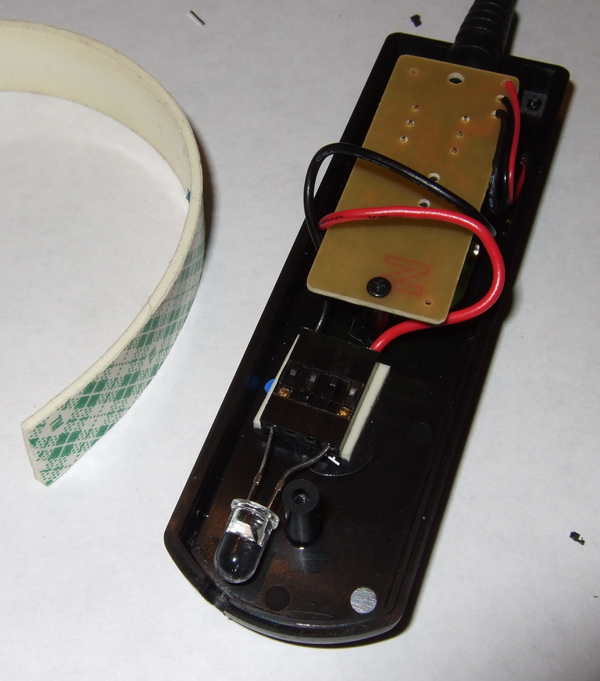
So use some double sided foam tape or whatever... to stick down the
connector and install the phototransistor as shown. Note
the notch drilled into the top half of the RR-80 case. At
first I drilled a single hole, but later did the same on the other half
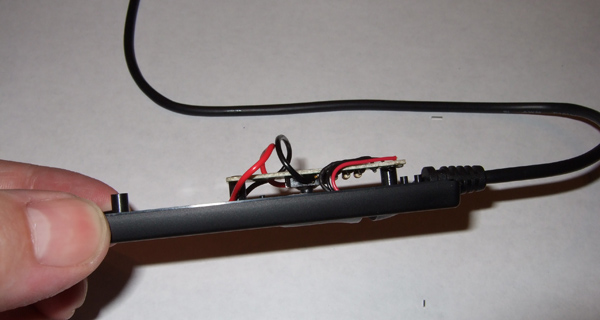
of the case to make an oval opening.. Screw the PCB board
back in place with the short screw. OK, so its basically done.
Make sure the wiring doesn't interfere with the operation of the
switch! Note how the slack is looped up over the
PCB. Using thinner wiring would have been
better. But given lemons...
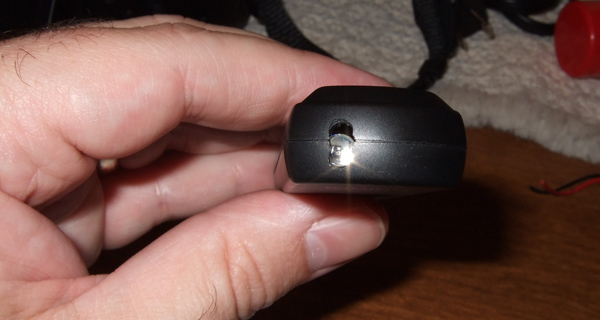
And we are done! Remember that you will need to find
a way to cover this hole when you don't want the photodiode to trigger
a shot. I'll leave that as an exercise. But
would obviously have room for a small switch on the other side which
could interrupt the photodiode. I, on the other hand, used
a small piece of black electrical tape. No big deal either
way.
Testing
Well, first make sure your RR-80 works as it normally did. (
Well, duh! ) Cover or disable the phototransistor.
With the camera off, attach the RR-80. Turn the camera on,
and then half-press the RR-80 button. This should trigger
the camera AF and exposure lock. Then try the
full-press. Its should snap off a picture. If
not, check your work..
If everything checks out, see if the photodiode is working.
Cover the hole with your finger, point it in the direction of a bright
incandescent light source or direct sunshine. Incandescent or sun is
necessary as this is an IR device and certain flourescent lights will
not produce enough IR to trigger the device.
Elaboration and
Caveats
We have no IR filter in place, so it will respond to visible light on
the red end. You can get an IR filter by salvaging a piece
of IR filtering plastic from an old IR remote control or iRDA
reciever. This will reduce / eliminate accidental
triggering. Also the phototransistor varies its resistance
at varying levels of light, so it will first trigger the cameras
half-press response at a lower level of light, and then finally the
full press response under brighter light. This can be
fixed by placing a transistor in addition to the photo transistor so
the response is much more on / off.
Usage
I have a GentLEDS AUTO intervalometer for another camera.
It has an on / off switch, potentiometer to set the interval, a red
LED, and an IR LED. The red LED tell us humans the
intervalometer is operating, and the IR LED tals to the
camera. We have modified the RR-80 to signal
full-press when IR shines on the phototransistor. The
GentLEDS AUTO emits a burst of IR periodically, so we can use it to
trigger OUR modified RR-80, using it as an IR Remote.
So I can recycle my GentLEDS AUTO for my Canon HV-20 camcorder and use
it to trigger my S100fs as well.
Here is a video of the GentLEDS AUTO firing my S100fs via the modified
RR-80. It also shows the initial testing of triggering the
shutter by interrupting light to the phototransistor and the final
assembled RR-80.
So we can easily affix the AUTO to the RR-80 using electrical
tape. But my favorite is to use a black latex
balloon, which mates the two together as a single unit and does
not interfere with the function of either. You could use
large diameter black heat shrink tubing as well.
Its also possible to use the modified RR-80 is a light sensitive
trigger. For example, if you set your S100fs in long period
continuous shooting mode, the camera will sit there until enough light
shines on the phototransistor to trigger the full-press
signal. This will start your camera shooting.
When the light goes out, it will stop. Rinse, repeat.
If you use an IR LED to shine a beam on the remote, when the beam is
interrupted this releases the shutter... and when the beam is no longer
interrupted, it will trigger the shutter to be depressed.
Essentially taking a picture when a beam is iinterrupted.
So possible applications include catching that cat that's eating the
garbage, or your spouse opening the fridge, or similar.
Again, you can increase the sensitivity of the modification by adding
an additional transistor to amplify the output from the photo
transistor. This would allow it to be triggered by even
less light. There is plenty of room in the RR-80 for these
additions.
High Praise for
GentLEDS
Frankly these folks are a pleasure to work with and know their
stuff. I had a Canon HV-20 and wanted an AUTO to trigger
the Photo button - in a week they made one for me. They
have great products and seem to be able to take requests from customers
and translate that into working devices very rapidly. Simply
put, they rock! My hope is that if enough of us are interested
in a USB attached intervalometer and IR Remote for the Fuji cameras,
these folks would be able to create one for us. God knows
Fuji won't.
I like that I can use the AUTO for my HV-20 in conjunction with my
modified RR-80... but I'd rather be able to buy a dedicated unit rather
than sharing one between the two cameras. On the other
hand.... you could see where the AUTO could be set up to have BOTH
cameras running in tandem, synchronized. Which would open
up some interesting possibilities, perhaps.